How to issue European Digital Credentials for Learning
A step-by-step guide to help build, customise, issue and use your own European Digital Credentials for Learning.
Here you will learn how to issue European Digital Credentials for Learning (EDC) using either the EDCI Issuer or your own EDCI-compatible issuer. To familiarise yourself with the process, you can experiment with the platform features before filling the prerequisites and committing to acquire a qualified electronic seal. The so-called ‘Playground’ environment allows the issuance of credentials with a ‘mock-seal’, but credentials issued from this platform will fail the SEAL verification step in the viewer.
There are two basic options to prepare your data to issue European Digital Credentials:
- The platform is integrated with EU Login, so you can register an account and start creating and storing credential templates that are only visible to you entirely via the browser in the Online Credential Builder.
- Alternatively, you can export a package from your student information system as XML.
First, you will need to obtain an advanced or qualified electronic seal. A qualified electronic seal is an electronic seal compliant to EU Regulation No 910/2014 (eIDAS Regulation) for electronic transactions within the internal European market. It enables verification of a document’s issuer over long periods of time. Qualified electronic seals can be considered as the digital equivalent to a legal entity’s paper seal. If your institution doesn’t have one already, visit this web page to find a trust service provider in your country.
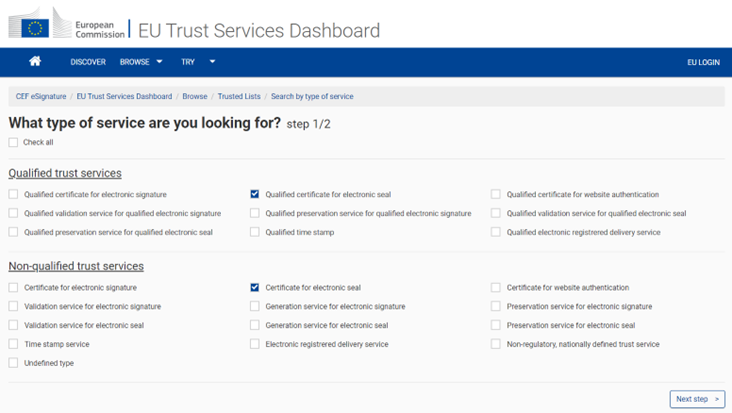
The eIDAS Regulation defines electronic signature, qualified electronic signature and qualified electronic seal as follows:
- Electronic signature: data in electronic form which is attached to or logically associated with other data in electronic form and which is used by the signatory to sign.
- Qualified electronic signature: an advanced electronic signature that is created by a qualified electronic signature creation device, and which is based on a qualified certificate for electronic signatures.
- Qualified electronic seal: an advanced electronic seal, which is created by a qualified electronic seal creation device, and that is based on a qualified certificate for electronic seal.
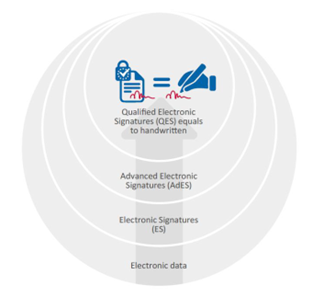
Read more about requirements for advanced electronic seals and qualified electronic seals.
| Properties | Qualified e-Seal | Advanced e-Seal |
|---|---|---|
| Cannot be denied legal admissibility solely on the grounds that it does not meet requirements for electronic seals | YES | YES |
| Enjoys direct presumption of integrity of data and correctness of origin of data including across between MS | YES | NO |
| May be granted presumption of integrity of data and correctness of origin of data by (a) policy or (b) legislation in individual MS (such declaration means that advanced seals from other MS must also be accepted) | YES | YES |
| Likely to be admissible in cases where a notarial signature/apostille would typically be needed to confirm authenticity | YES | NO |
| Likely to be accepted by a public administration | YES | MAYBE |
| Likely to be accepted by an employer | YES | YES |
If you are embarking on the Seal acquisition process, please make sure that you identify a Trusted Service Provider who can deliver a QCert for eSeal, noting that there is also QCert for eSig, that is a different service.
A trust service is an electronic service that involves one of the following:
- Creating, verifying and validating electronic signatures, seals or time stamps, electronically- registered delivery services and certificates that are related to those services.
- Creating, verifying and validating certificates to be used for website authentication.
- Preserving electronic signatures, seals or certificates related to those services.
Once you have acquired your institutional e-Seal, you will need to have NexU installed on your computers. NexU is an innovative, open-source multi-browser multi-platform remote signature tool with a purpose to communicate with smartcards. It relies on Nowina’s XSS-Sig Module to support interoperability of electronic signature in Europe.
- Without applet: the solution communicates with the smartcard through Javascript.
- Open source: anyone can use NexU and contribute to it. To access the open-source version, please follow this link: NexU GitHub project
- Powered by DSS: based on SD-DSS, the EU reference implementation for electronic signature.
You can find more information about Nowina’s solutions at http://nowina.lu/solutions/.
Once you have acquired a qualified e-Seal and installed NexU, we recommend that you test your device by pressing the “Test your e-Seal” icon on the main EDCI Issuer page.
Both in the ‘playground’ and ‘production’ environments any interested party can access the credential data preparation tools, namely the Online Credential Builder, but issuers will need to have an e-Seal to be able to send these credentials. In the ‘playground’ environment there is no restriction on the type of seal issuers use, so any self-signed certificate can be used to run the complete credential awarding flow. However, institutions wanting to issue real, legally admissible digitally-signed credentials, need either to have access to an advanced or qualified electronic seal or get a third party to seal on their behalf – this credential type is called “mandated issue” (link to be inserted).
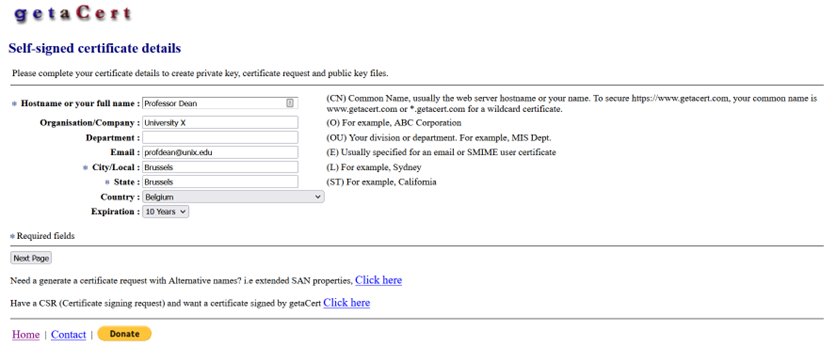
Institutions interested in testing the EDC service are invited to use the getaCert service (or an alternative of their preference) to register a self-signed certificate.
Fill in the handful of compulsory fields as instructed by the form and click on “Next Page”.
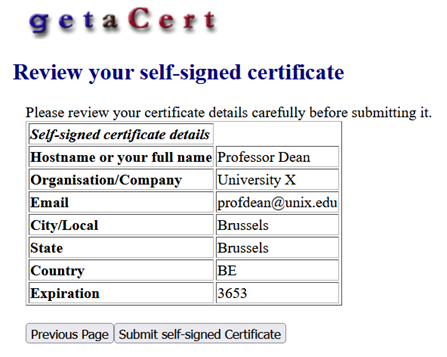
Review your self-signed certificate and hit the “Submit self-signed Certificate” button.
The next page will provide you with links to important information and documents.
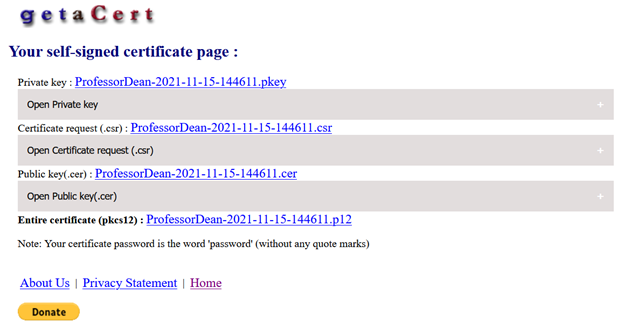
Click on the “Public key(.cer)” and “Entire certificate (pkcs12)” links and save these files, then follow these installation steps to install your newly created self-signed certificate, that will be your ‘mock seal’ to seal test credentials in the ‘playground’ environment.
There are two basic options to prepare EDC data:
- The platform is integrated with EU Login, so you can register an account and start creating and storing credential templates that are only visible to you entirely via the browser in the Online Credential Builder.
- Alternatively, you can export a package from your student information system as XML.
Both options are detailed on this page.
Below you will find a step-by-step guide on how to complete the online Credential Builder complemented with pictures.
To access the online builder, you need to login in with your EU Login username. If you do not have an EU Login account, click on ‘Create an account’ and follow the procedure.
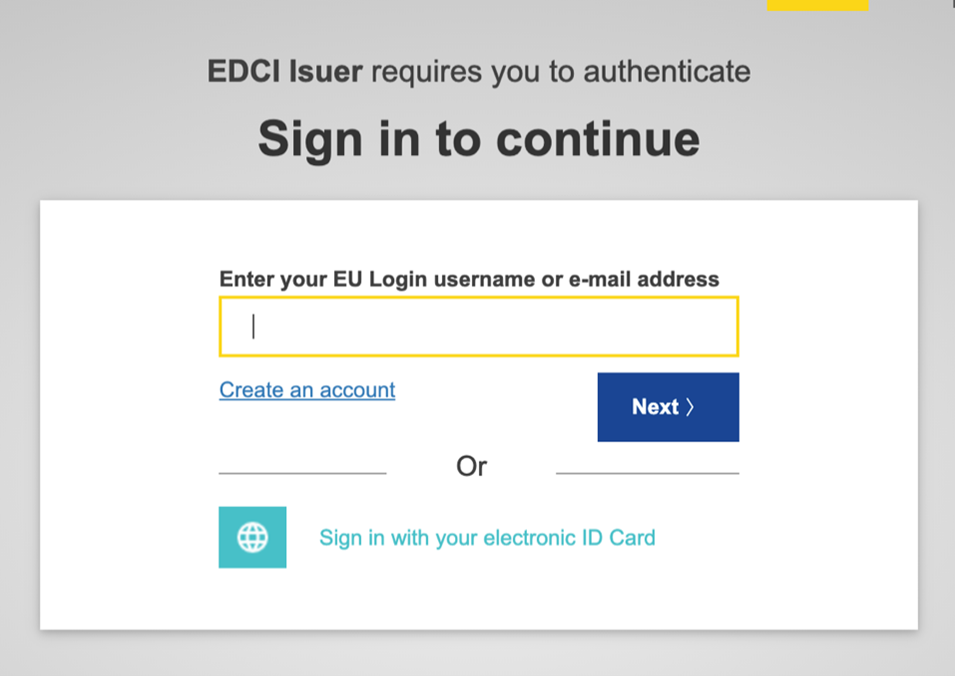
Once you have logged in the Online Credential Builder, you get into the ‘Credential Template’ section where you will be able to assemble your EDC and find any Credential template you have created before.
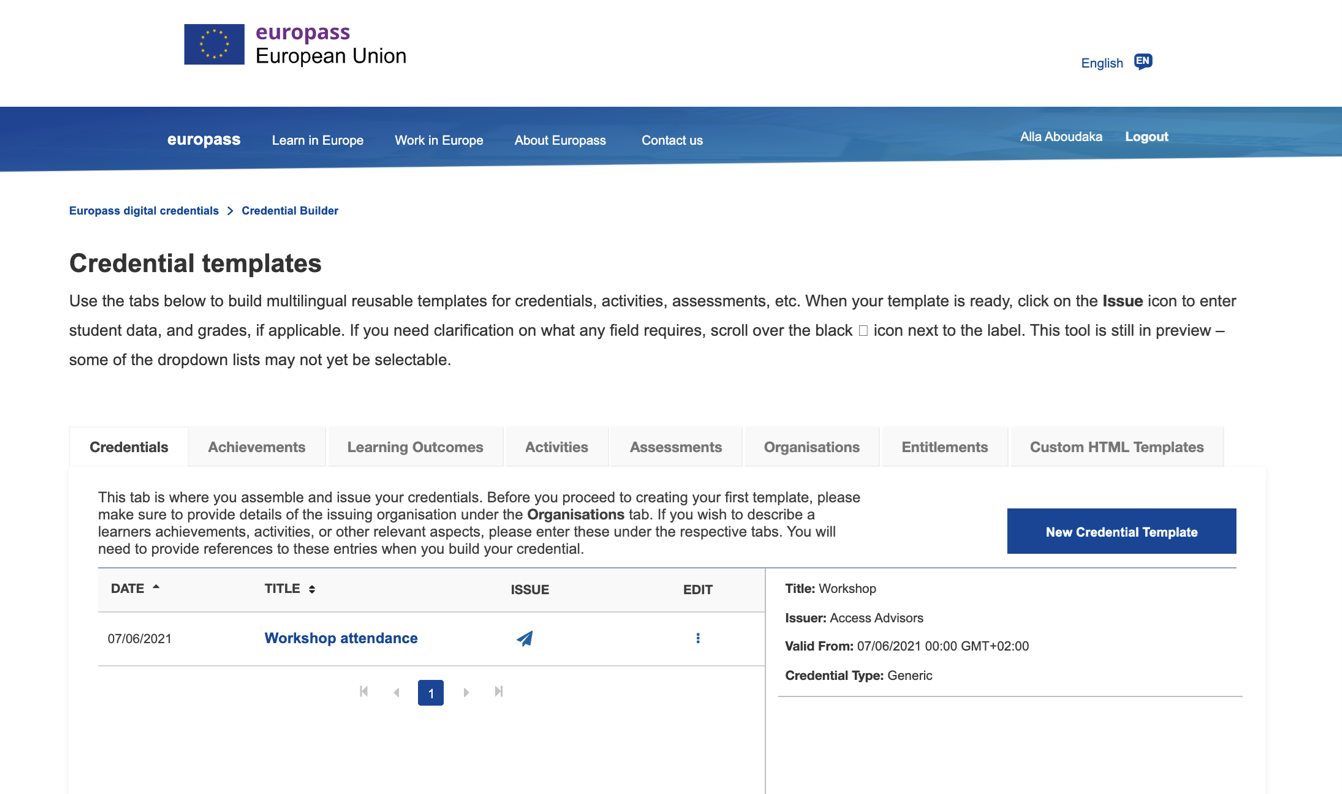
There are 8 clearly distinguished tabs to support you in recording your credential data in a systematic manner. In each tab, the mandatory data fields are marked with a red asterisk. You will only be able the save the information if you have filled in the minimum necessary information.
Note that before you create your credential template, you need create an organisation in the Organisations tab (see the next section for more information).
The first “European Credentials” sheet contains the highest level of data. This is where you can specify the title, detailed description, the issuer, the type of credential, and “Valid from” date of your to-be-issued credentials. The issuance and, if applicable, expiration dates are determined by you.
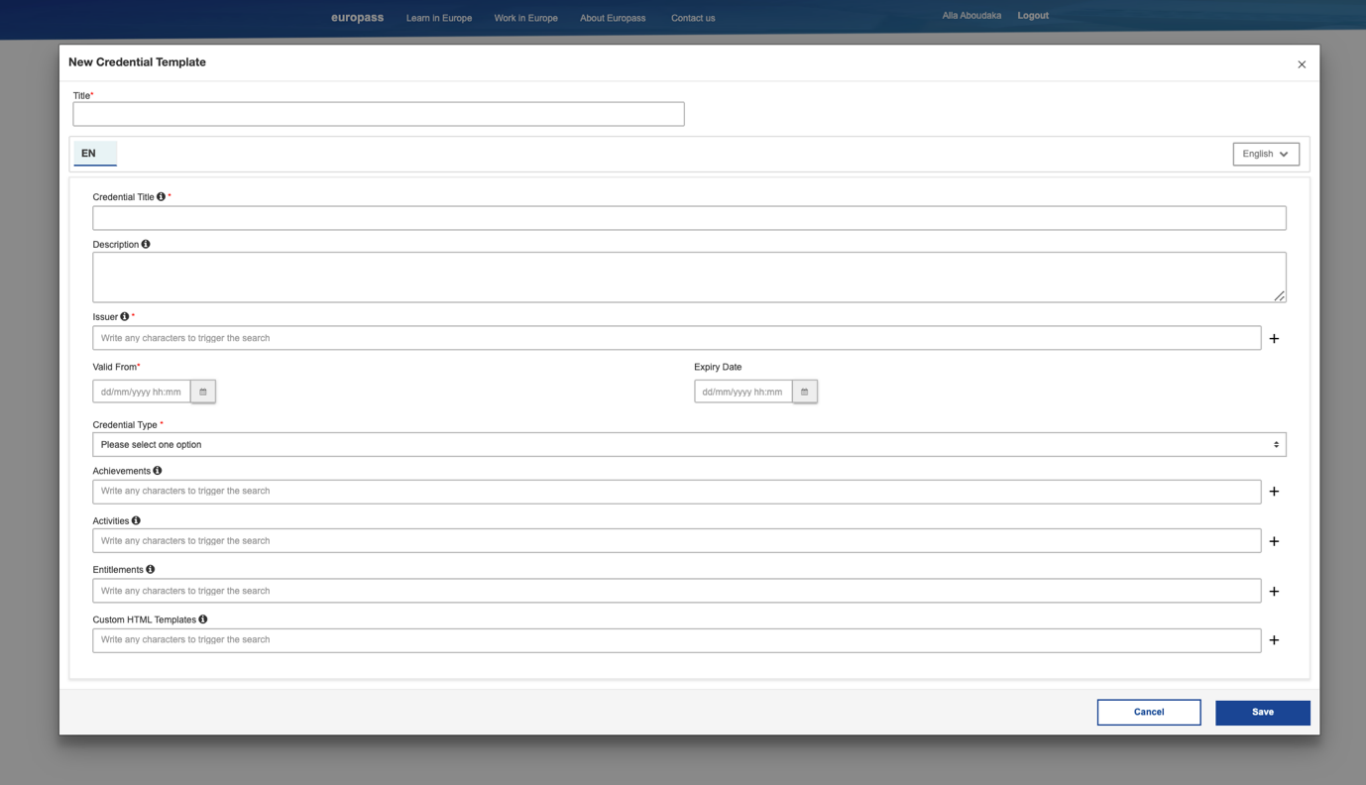
In this tab, you will be able to add information about the Achievements, Activities, Entitlements and the Custom HTML Template. By clicking on the ‘+’, next to each line, you will be taken to a new pop-up window where you will be able to fill in this information.
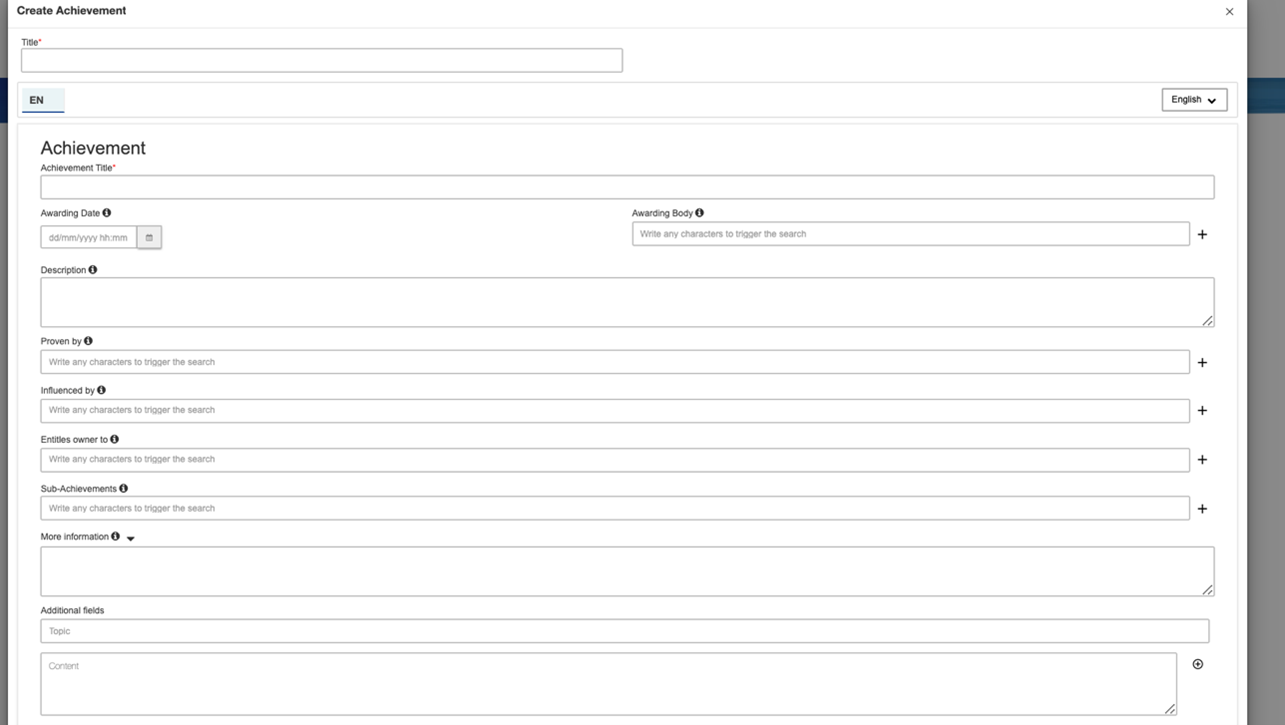
The Achievements tab will allow you to describe the learning achievements in detail. The Tab is information is divided in three separate category ‘Achievement’, ‘Specification’, and ‘Qualification’. Read more about Achievements.
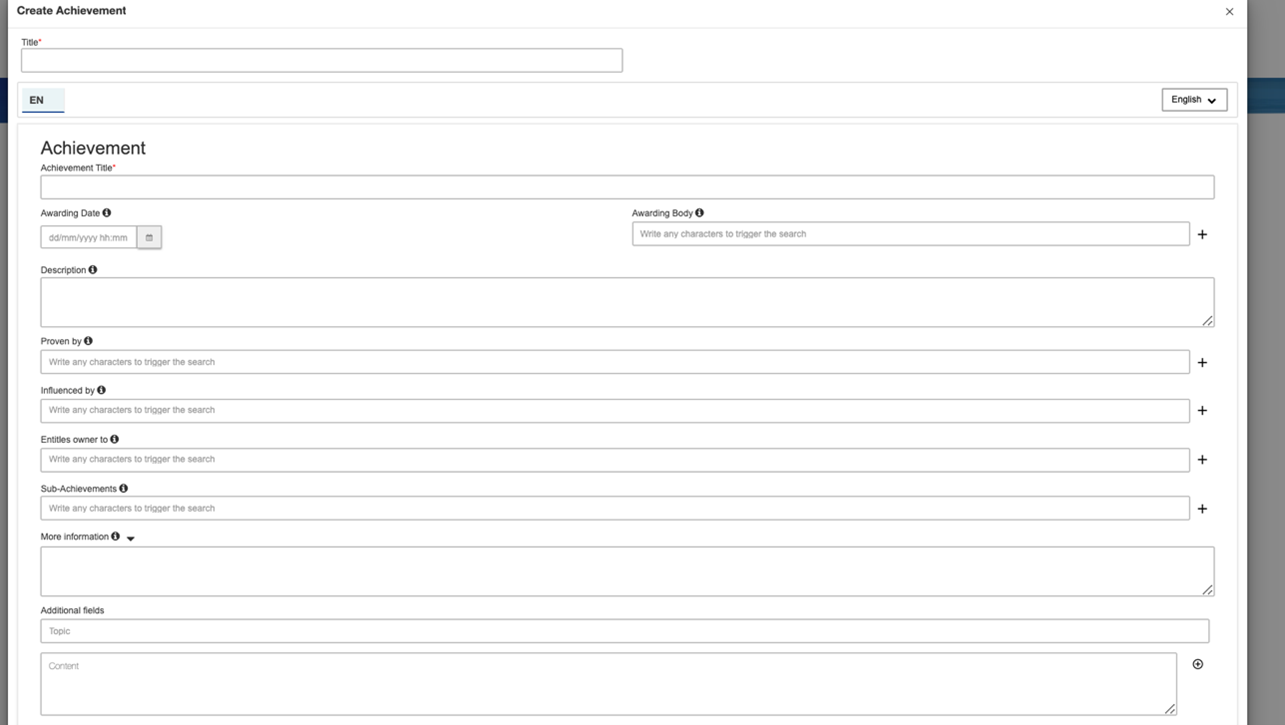
In the “Achievement” section, you will be able to describe the achievement in detail by providing information on regarding the date the achievement has been awarded, who assessed it, which activities were performed for it, what entitlements the achievement provide, and the awarding body,
Please note that to provide information on activities, entitlements, assessments, and organisations, you will need to create a related entity either by filling in the information first in the Activities, Entitlements, Assessments, Organisation tab or simply by clicking on (+) next to appropriate section in the Achievement tab. A new pop-up window will open, saving your information on the form.
You can always navigate back to the Achievement form by closing the new pop-up window.
Finally, if smaller achievements can be stacked into a larger one, you can communicate this by selecting the sub-achievements of a more complex one.
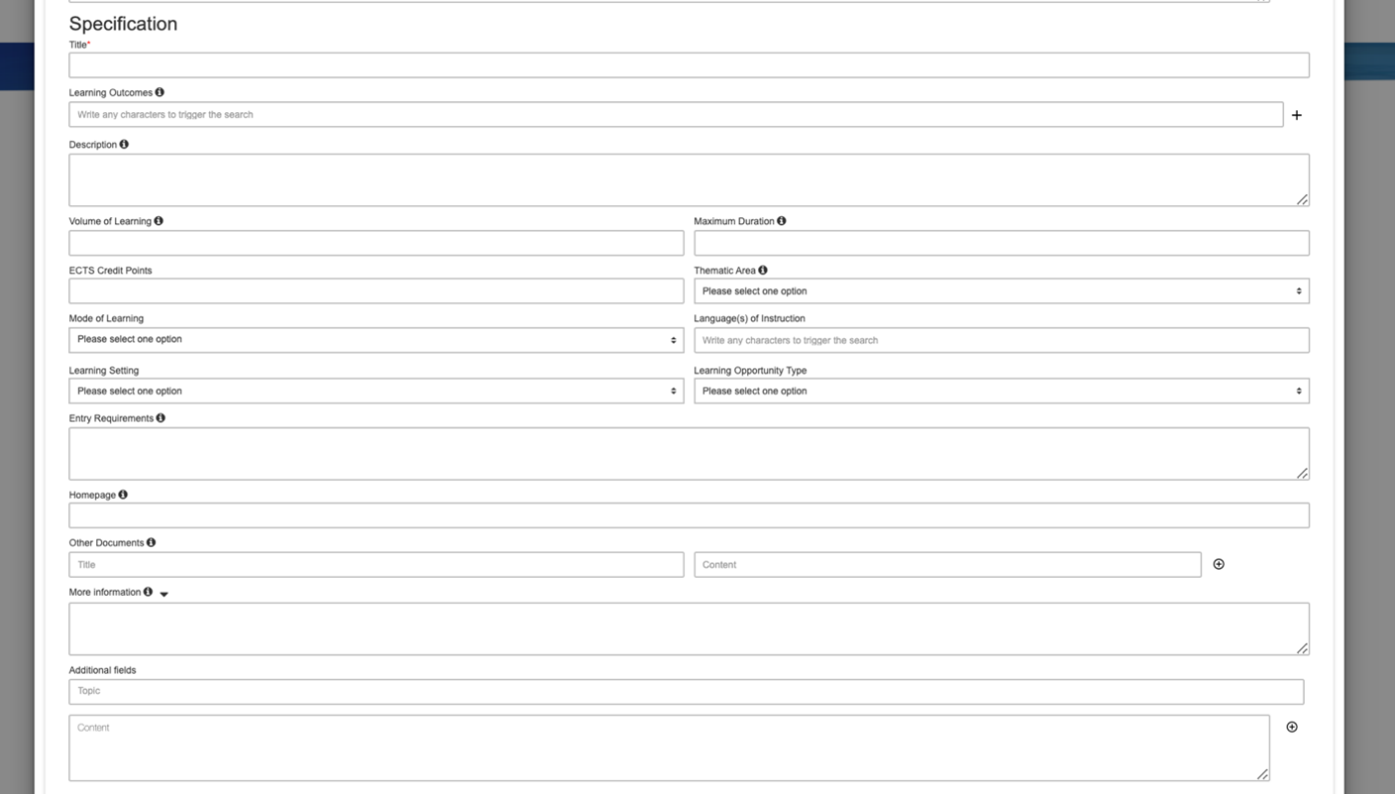
In the “Specification” section you can provide further details for an achievements, such as
- a selection of learning outcomes – that you first have to add on the “Learning Outcomes” tab or that you add by clicking on ‘+’;
- the estimated number of hours the learner is expected to spend engaged in learning to earn the award;
- the maximum duration of the undertaken learning opportunity – please note that for both the volume of learning and maximum duration values, only positive whole numbers (no decimals) are accepted;
- ECTS credit points earned;
- Thematic area according to the ISCED-F classification;
- Mode of learning
- Language (or languages) of instruction;
- Whether the learning setting is formal or non-formal;
- The type of learning opportunity and
- Other documents and additional information including web pages.
.
In the Learning Outcomes tab, you will be able to list and describe all the knowledge, skills and competences that your learners have achieved by successfully completing a learning opportunity.
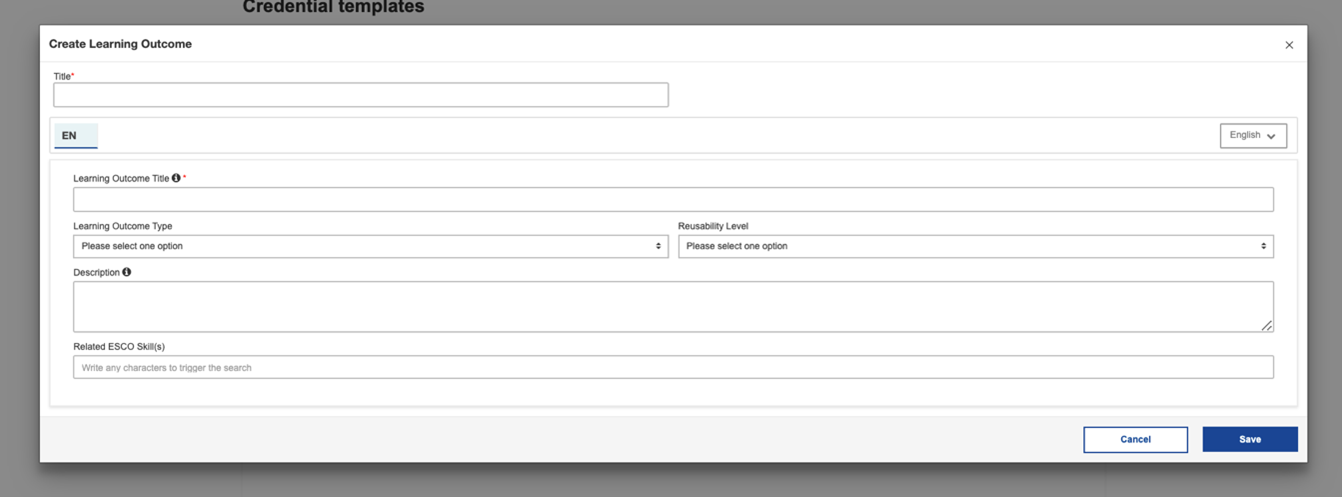
If possible, we recommend that you take advantage of the multilingual European Skills/Competences, Qualifications and Occupations classification, and that you consult the ESCO portal to make your learning outcomes instantly translatable to other EU languages. Please note that the type and reusability level of your learning outcomes is also described in ESCO terms, enhancing the quality of your credential’s metadata.
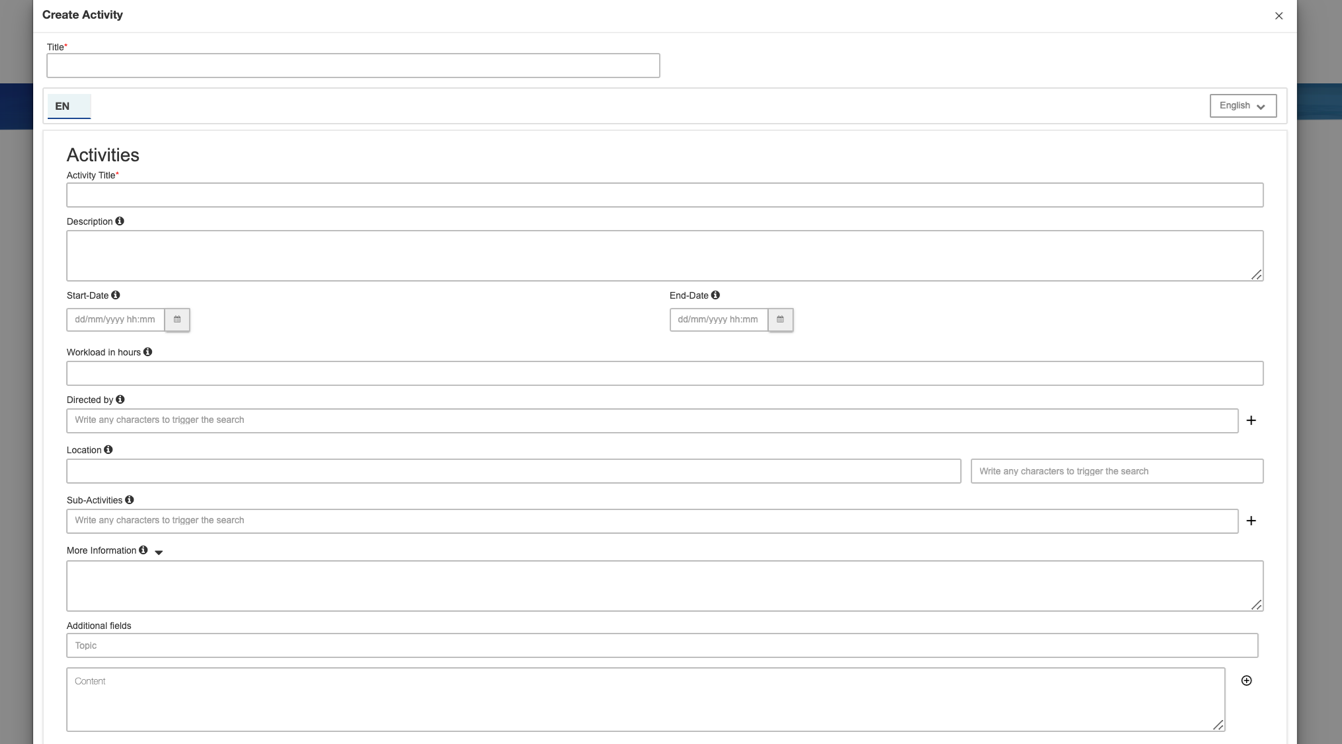
In the Activities tab, you will be able to describe the learning activities which leads to the acquisition of knowledge, skills, responsibility or autonomy.
You will be able to include details on:
- Start and end dates
- Workload in hours - The workload is the actual number of hours the learner has spent engaged in the activity. This would include the estimated number of hours in class, in group work, in practicals, as well as hours engaged in self-motivated study.
- The organisation that directed the activities – there may be several . You can either first enter them on the Organisation tab or by clicking (+) next to ‘Directed by’.
- Location
- Any sub activities which are composite of the Activity.
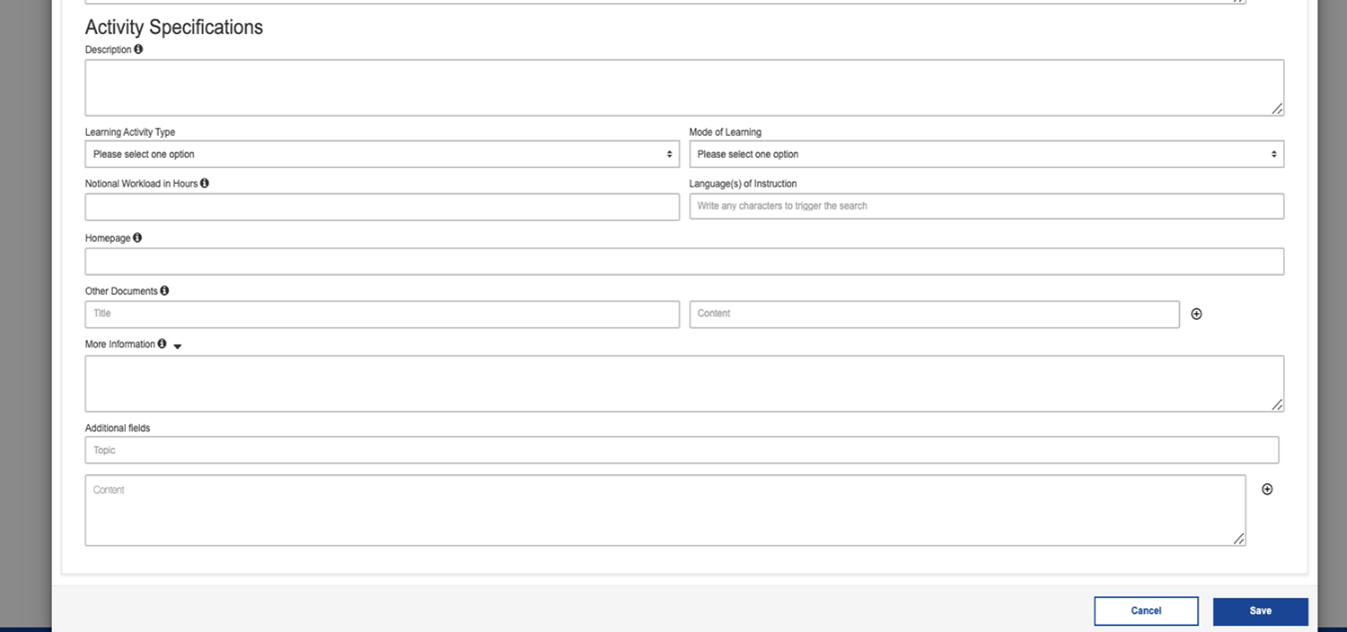
In the Activity Specification section, you can provide information about the learning opportunity that is already available before the delivery takes place. The specification would be the description of the learning activity in theory, without a start and end date and with just an estimated volume of learning, while the activity itself is the concrete manifestation of that specification with a particular start and end date and a real actual (i.e. not just estimated) workload in hours.
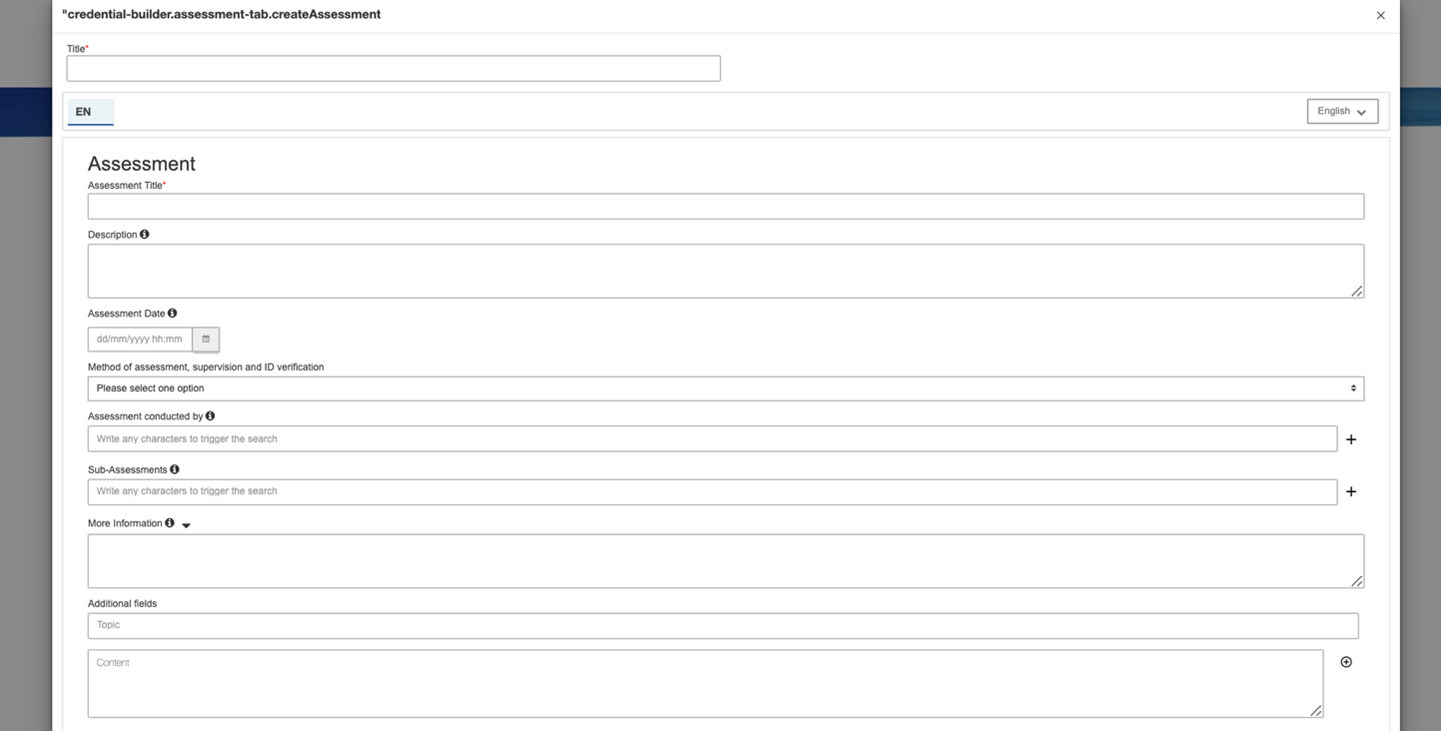
In the Assessments tab, you will be able to describe the assessment process of your learners. You will able to provide:
- The date of the assessment
- The method of assessment
- The organisation that performed the assessment
- Any connected sub-assessments
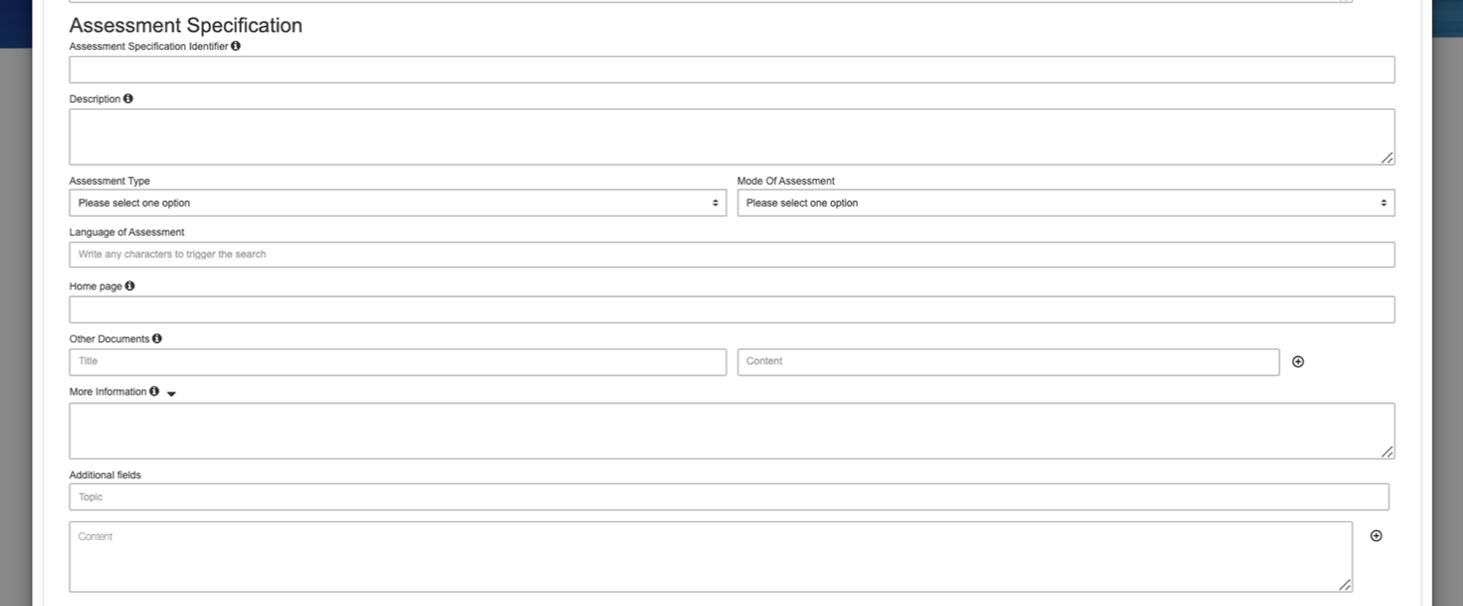
The assessment specification is the recipe for assessment implementations. You will be able to describe the language of assessment, the mode of assessment, the assessment type, and add other website links to provide more detail to your credential.
The Grading Scheme section allows you to provide more information about the grading scheme used for the assessment.

In the Organisation tab, you will be able to create and fill in all the information about the legal person/ registered entity which issues the digital credential, conducts the learning activities or assessment or acknowledges the credential holders' entitlements.
The only information compulsory for you to fill in to create an organisation is:
- The legal name
- The legal Identifier
- The country of the organisation
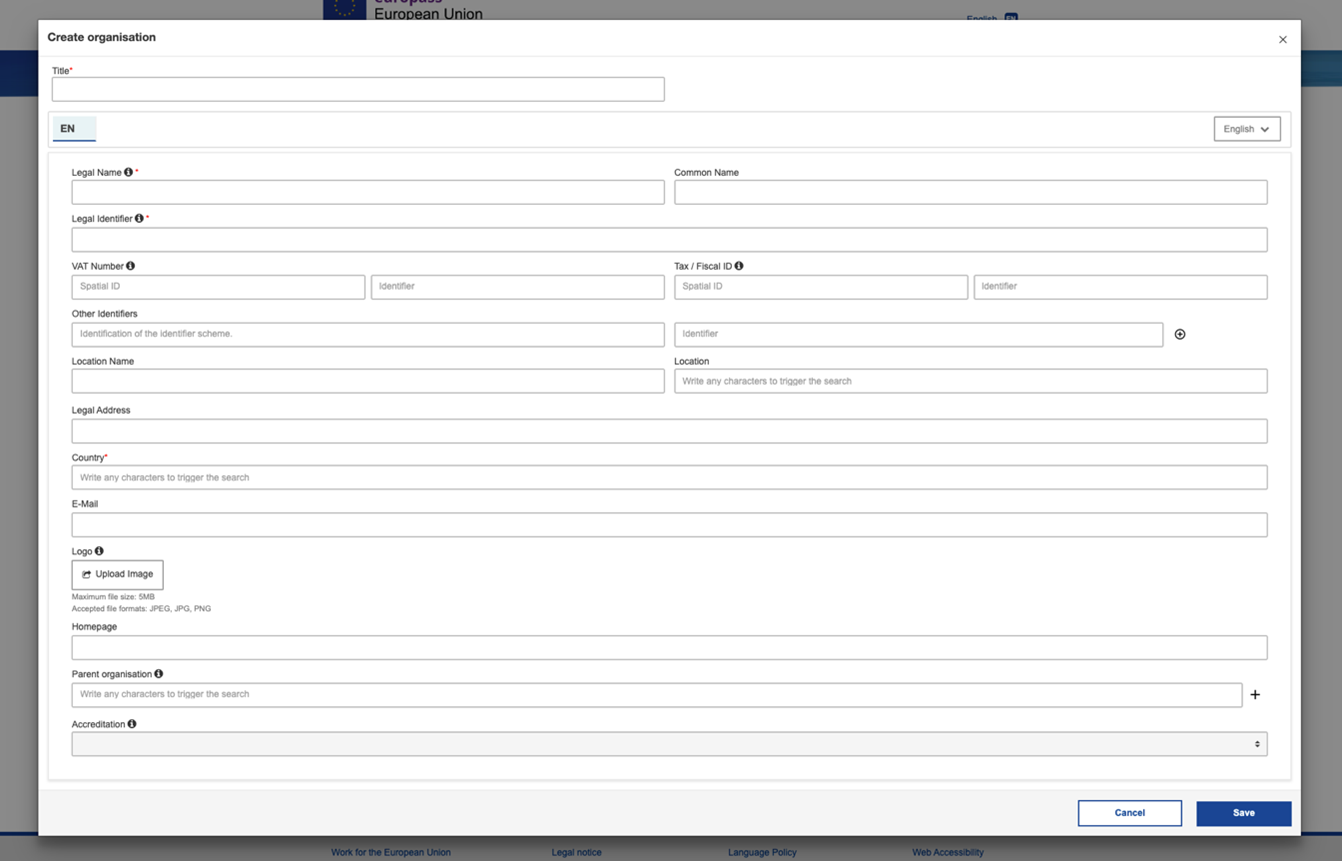
You are free to provide as many details as you like about the organisation such as the VAT, Tax/fiscal ID, the legal address, or even a logo. Please note that the legal identifier (compulsory data) and the VAT and tax/fiscal identifiers are composed of two bits of data, a so-called spatial ID indicating the organisation’s country of location, and an identifier, that is normally a series of numbers and letters.
It is possible to specify that an organisation has a parent organisation by creating another organisation and connecting the two organisations in the section ‘Parent organisation’.
Once you have saved your organisation, it will appear in the tab menu where you will be able to see all the organisations you have created. You can edit, delete or duplicate them at any time.
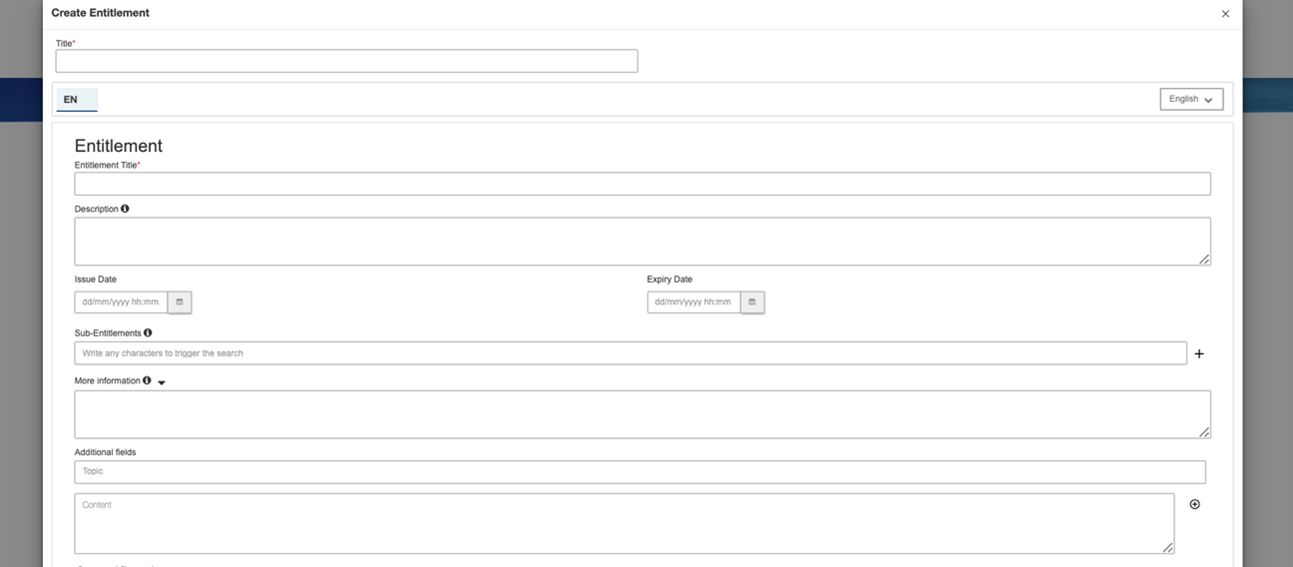
In the Entitlements tab, you will be able to describe the rights of a credential holder, typically as a result of a learning achievement.
On the “Entitlements” tab you can provide a detailed description of these rights, following a similar structure to achievements, activities and assessments in the sense that you will have a generic specification section and details of the manifestation of that specification, such as issuance and – if applicable – expiry dates.
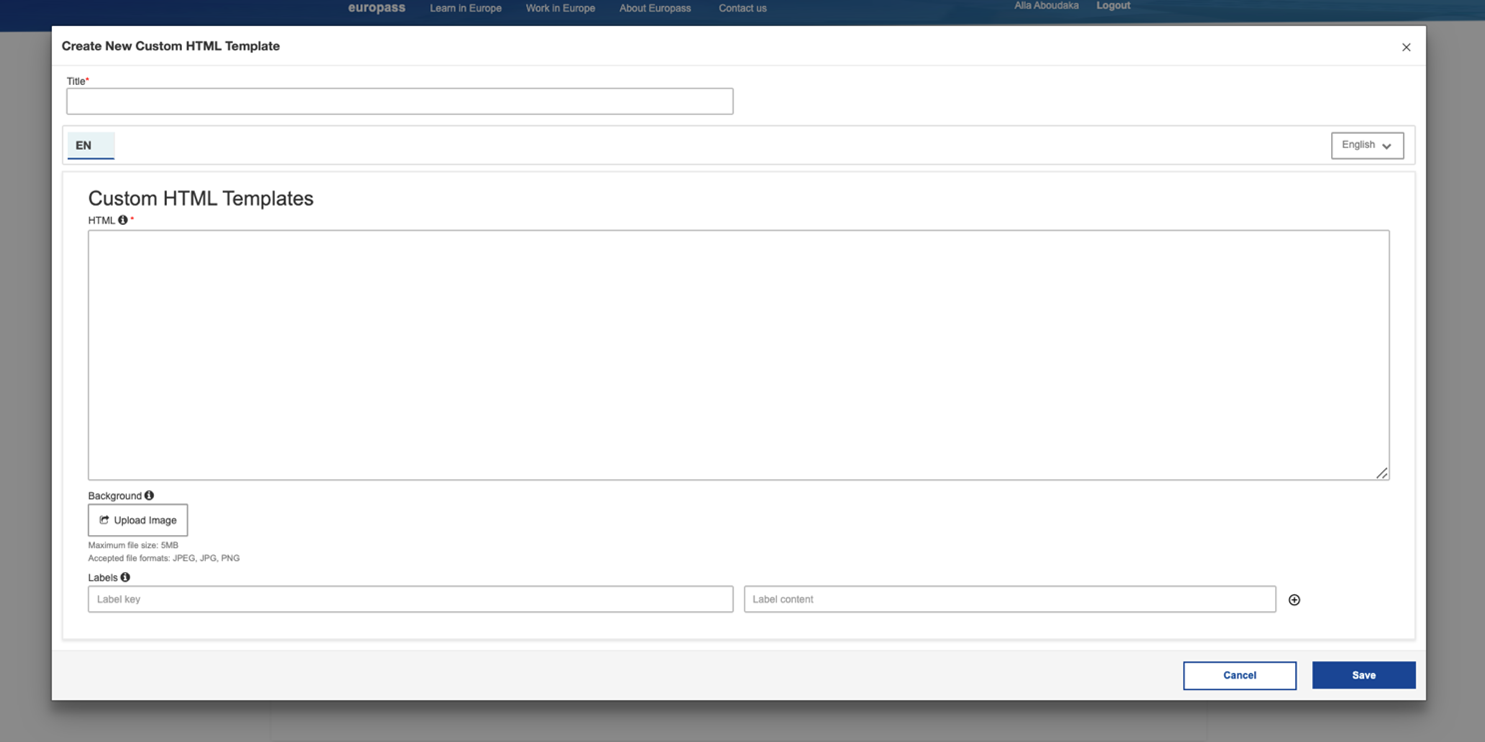
Apart from the default white and blue European Digital Credential for Learning (EDC) template, a Verifiable Credential can contain its specific version of the EDC to support a customised look and feel. The EDCI Viewer displays an HTML representation of the credential, so that is why this custom credential will be built in HTML + CSS (no JS) inside the EDC's XML structure, and will use wildcards to choose EDC content (credential subject's name, titles, descriptions, etc.) and to show EDC non-related translatable labels ("certifies that", "has achieved", etc.
In the Custom HTML template tab in the Online Credential builder, you will be able to create your own custom credential template inside the EDC's XML structure. The template can use wildcards to choose EDC content (credential subject's name, titles, descriptions, etc.) and to show EDC non-related translatable labels ("certifies that", "has achieved", etc.).
Here you can find some code sample and instructions on creating custom HTML template.
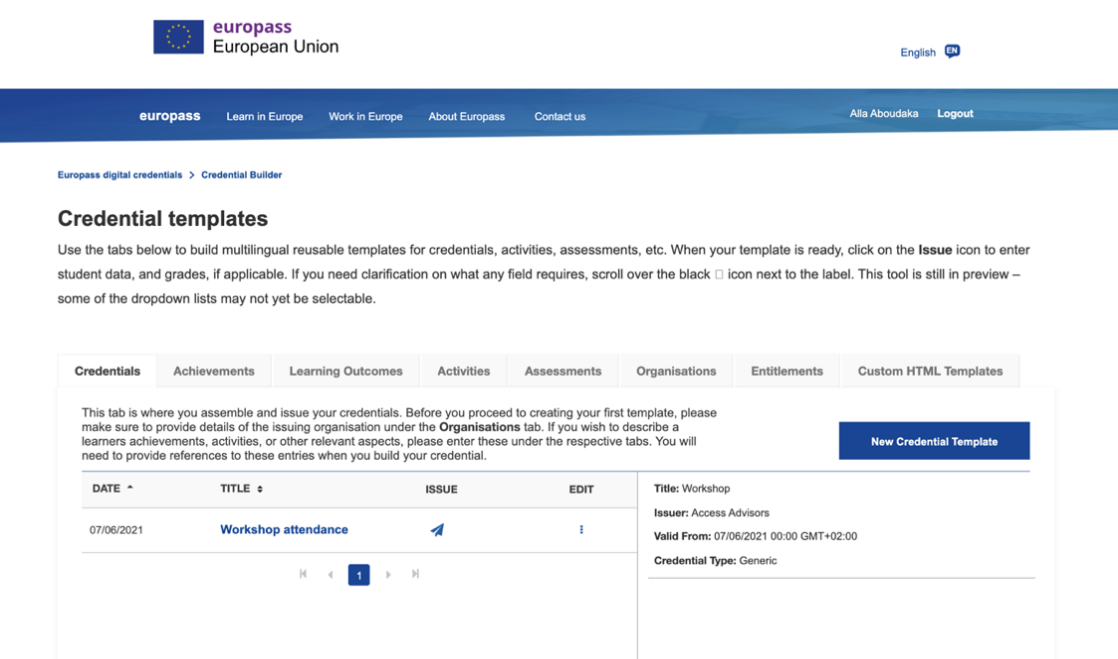
To issue and send your digital credential, click on the sending arrow.
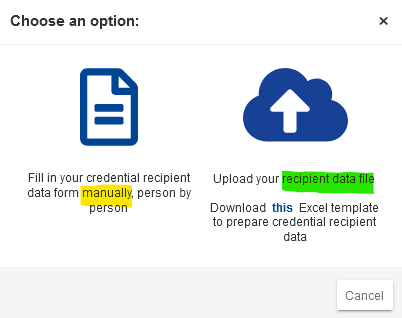
Now choose from the two options of credential recipient data provision. In case you only have a few credentials to issue, you may prefer to enter names and addresses (and grades, if applicable) manually, otherwise you can download a simple Excel template that allows you to prepare your recipient data file for 10-50 credential recipients.
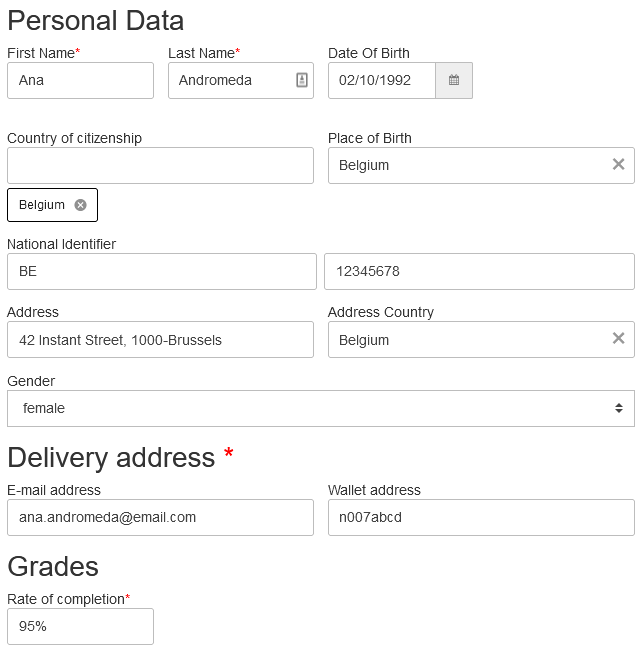
You need to fill the necessary information:
- First name
- Last name
- Email – address
The other additional information are optional but make the credential more authentic and uniquely attached to a personal recipient. You can add as many recipients as you need.
Now you can click on the Next button in the bottom right corner of your dialogue window to preview, seal and send your credential(s).
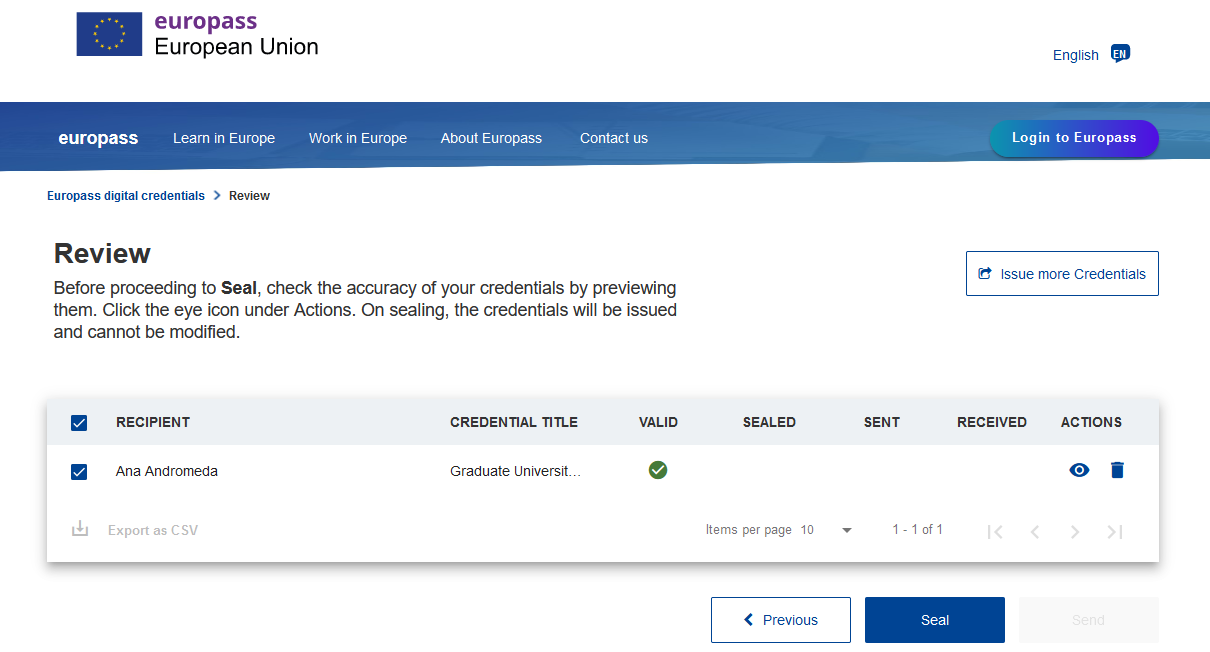
Once you upload your XLSM file, or clicked on the “issue” icon in the Online Credential Builder and supplied your credential recipients’ personal information, you can click on the eye icon to preview your credential(s), or go straight to pressing the blue “Seal” button.
If this is the first time you use your new mock seal, NexU will provide you with a Signature Mean Selection window, where you should choose the “New keystore” option.
If you already have your e-Seal, you will be able to access it from the “Windows keystore”.
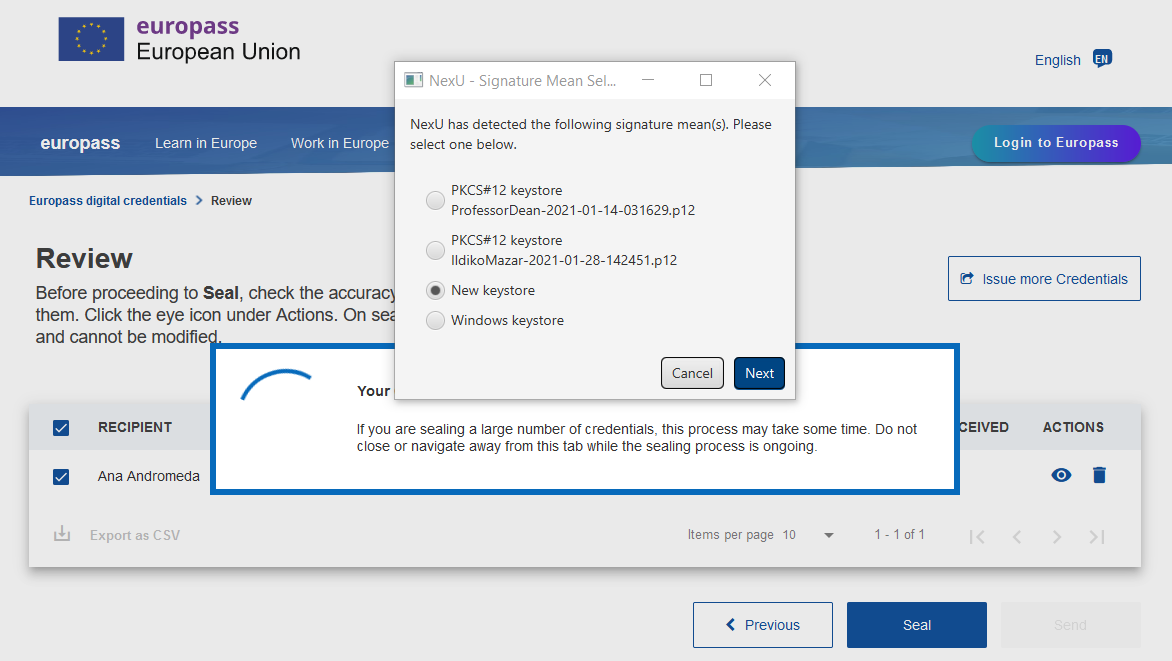
If using a 'mock seal' : Select the Type of the Keystore (PKCS12) and, for the Keystore question, the certificate you downloaded before. Now you will be prompted to provide the ‘password’ getaCert gave you on the notification screen, and you’ll be offered an opportunity for NexU to remember this signature for future use. Once you already added your signature, you will just have to select it from the opening screen after you pressed the “Seal” button, or choose “Windows keystore” and choose the key stored there as shown below.
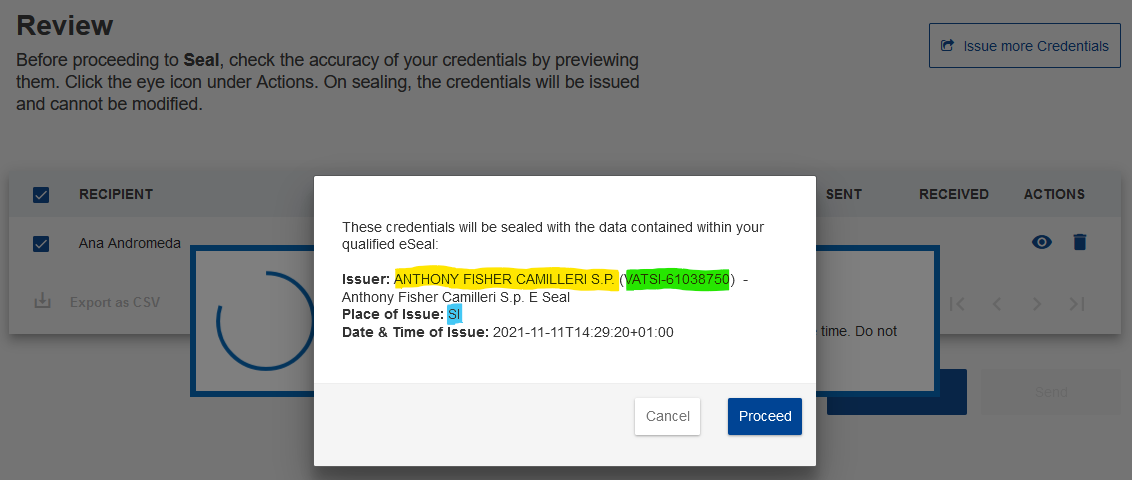
Please note that whatever data you supplied for organisations in your credential templates, the 3 compulsory pieces of information about the issuer organisation, i.e. legal name, legal identifier and country of organisation, are always replaced with the data contained in the eSeal (as displayed below).
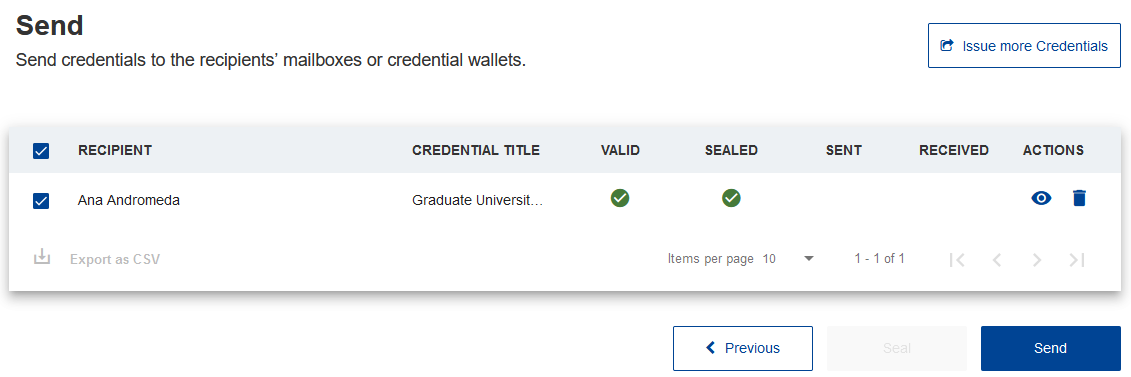
After you successfully sealed your credential, a green tick icon will appear in the second column of the dialogue window.
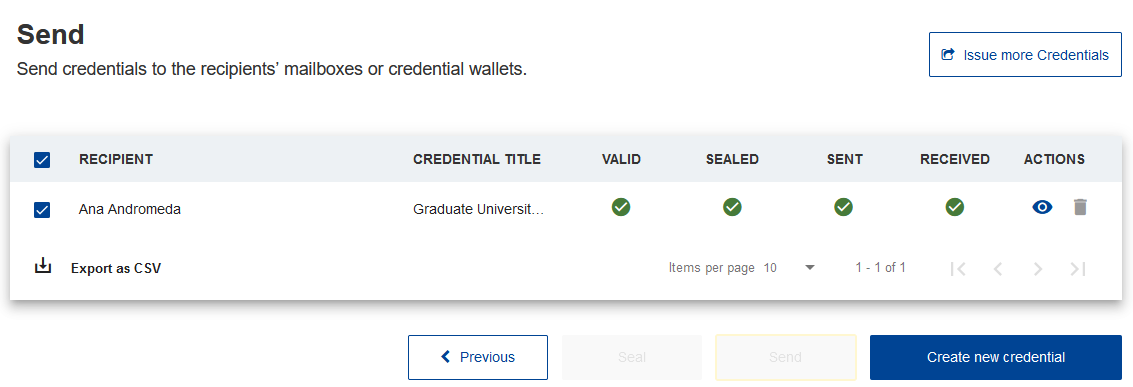
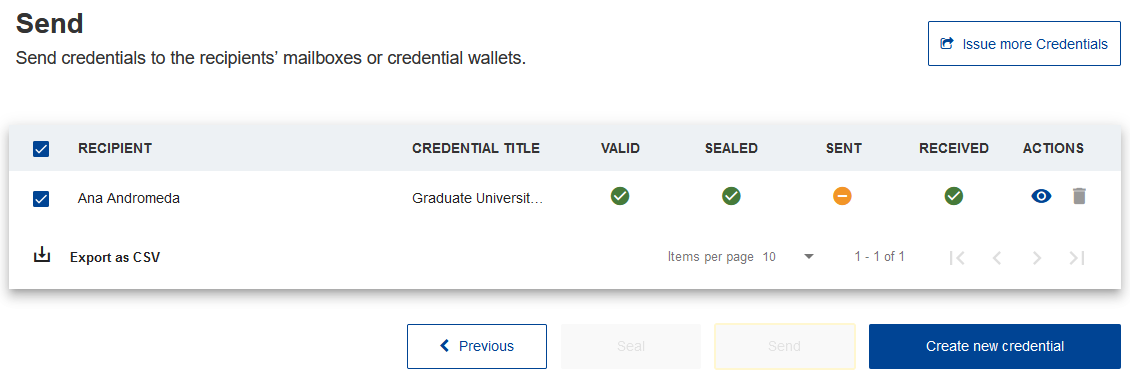
After this step, you can click “Send” and your credentials are on their way to their recipients – the SENT column will indicate safe dispatch of the credential via email, while the RECEIVED column will show the successful direct deposit of the credential into the recipient’s wallet. If you only provided the wallet address of the credential recipient, you will see an orange ‘no entry’ symbol in the SENT column.
If something remains unclear, our support team is here to help you. Reach out to us via email with your question or issue and we will be happy to support you in your journey to create and issue European Digital Credentials : EMPL-ELM-SUPPORT@ec.europa.eu


 Facebook
 Twitter
 Linkedin